The Different Ways to Equalize Ears

Have you ever dived into the pool and realized that your ears started to hurt when you got deeper? This is because of the water pressure, and the reason why scuba divers and freedivers will need to learn how to equalize their ears. There are many different ways to equalize ears and you can try them to see what works easiest for you!

Ways to Equalize Ears

Valsava Manoeuvre

This is the most common method of equalizing and is easy for beginners when practicing equalizing techniques. Simply pinch your nose, then attempt to blow out through your nose. This will normally force air up the Eustachian tube and equalize the inner ear.

There is however a drawback to this method. It does not make use of the muscles which open the Eustachian tube. So, if there is already a pressure differential then the procedure will not work. If you cannot equalize, then you will need to ascend a little, before attempting again.

You must always be careful not to blow too hard as this can cause an ear rupture or other serious damage.

Swallowing

For some people, swallowing is the most effective method of clearing the ears. When you swallow, the throat muscles help to open the Eustachian tube.

Toynbee Maneuver

The Toynbee maneuver is performed by pinching your nose (in a similar way to Valsalva), then swallowing. This opens the Eustachian tubes while increasing the pressure in the Eustachian tube.

Read More: Toynbee Maneuver vs. Valsava Maneuver: Which is Safer?

Lowry Technique

Similar to the Toynbee maneuver, but combining swallowing with blowing, this can prove to be one of the most effective procedures.

Frenzel Maneuver

To perform this maneuver, pinch the nose closed and use your tongue to make a clicking or “K” sound.

Tips for making equalizing easier

  • Practice equalizing in the hours leading up to your dive. Get in the habit of equalizing every couple of minutes. Then start to equalize on the surface before you start to descend.
  • Look up – lookup up extends your neck and can help open the Eustachian tube.
  • Descend feet first – descending with your head the right way up allows air to rise, and liquid to drain downwards.
  • Use a descent line – having a line to hold on to will help control your descent rate and allows you to easily stop if problems occur.
  • Stop if you feel and pain and ascend.
  • Keep your mask clear for the duration of the dive. Water will irritate the mucous membranes.

Why do we need to Equalize?

The Eustachian tubes in our ears are normally closed to stop water and contaminants from entering our middle ears.

But water is heavy. When we go underwater that weight will start to build and push on our ears. The more it pushes, the more it will hurt.

This is why we will need to release that pressure and equalize that space.

By equalizing our ears, we are opening the Eustachian tubes slightly to allow the air from escaping. This will then correct the pressure in the middle ear and you won’t feel pain from the pressure

This does mean that as you go deeper, and under more weight, and more pressure, you will need to continue equalizing.

How often should I equalize?

You should equalize frequently as you go down when diving. This is because each time you descend, you are putting more pressure on your ears.

Some people will need to equalize every few centimeters/inches as their ears may be quite sensitive.

Some people find they only need to equalize every meter or so when descending.

I recommend equalizing as much as possible, especially if you are new to diving and not used to the pressure on your ears.

You will also find that some methods will work for your ears easier than the other methods. Trying them out in a controlled environment, such as a swimming pool, will make equalizing much easier on your next dive!

What does equalizing feel like?

Some people think equalizing means you will hear a ‘popping’ or clicking sound in your ears. This not always the case. For some people, they cannot hear or feel it when they equalize. However, if you do not have pain while descending then it means you have equalized!

What if I cannot equalize?

If you feel your ear is still ‘blocked’ and you feel pain in your ear, then this means it hasn’t equalized. You should then go up and ascend slightly. Just a few inches to relieve the pressure on your ears. You can then try one of the other ways to equalize your ears.

Try tilting your head from side to side or even wiggling your ear with your hand.

Remember the main thing is to go down slowly and equalize often. If you miss or ‘skip’ equalizing at a certain depth then you won’t be able to fix it until you ascend back to the level when your ear didn’t hurt.

What if I don’t equalize?

If you decide to continue downwards, even with the raging pain in your ears, then at some point you will puncture your eardrum. The pain will disappear but this is because the water is now flowing in and out of your inner ear. This is bad.

Bursting or puncturing your eardrum will result in the water reaching your balance organ. And this controls…your balance! This means you will have vertigo and lose your sense of up and down, on-land and underwater.

You will then get a Barotrauma which can take weeks, and in severe cases, months to heal. You won’t be able to get into the water and will need to be careful, even during a shower.

If you end up with an ear infection, when bacteria gets trapped in the ear, then this can be very painful and cause swelling.

Conclusion

When thinking about scuba diving, snorkeling, or freediving, then you will need to consider the ways to equalize ears. Practicing the different methods will make equalizing much easier on your next adventure. If you cannot equalize, then try again, or give your ears a rest. You won’t want to get caught with barotrauma or an ear infection that keeps you out of the water for longer!
How to Clean a Wetsuit at Home

Wetsuits are a great investment if you plan on being in the water, whatever your sport. They are long-lasting and can withstand the sun, the water, the pressure, and the cold. If you look after your wetsuit, it’ll be as good as new even in 20 years! But you will need to know how to clean a wetsuit at home and store it properly to reduce the general wear and tear of a wetsuit. We will also look at how to repair your wetsuit at home so that you can keep using it year after year.

Read More: How to Clean and Disinfect Your Dive Gear

How to Clean a Wetsuit At Home

  1. After your dive, try to rinse it with fresh water. This means using the shower on the boat if they have one, or hosing it down at the dive shop or beach shower. This removes salt from the neoprene material, and the zips from the wetsuit.
  2. Air-dry the wetsuit as best as possible. Try not to leave it too long in the sun as this can cause the wetsuit to discolor and also for the neoprene to harden over time. But making the suit as dry as possible before traveling will stop it from stinking too much! Even leaving it out in the wind will help.
  3. Do not wash your wetsuit in hot water, this will cause the neoprene material to lose its flexibility and wear down quicker.
  4. When you get home, fill a bathtub or large bucket with cold or lukewarm water. Add some baking soda, wetsuit shampoo, or antibacterial Dettol into the water. Let the wetsuit soak for 20 minutes or longer, then turn the wetsuit inside out and let it soak again for 20 minutes or longer. Swish the wetsuit around so that the solution gets into all parts of the wetsuit.
  5. You can use an old toothbrush to brush the zippers and velcro patches. This will loosen any dirt or sand that is stuck.
  6. After soaking, you can rinse the wetsuit in cold water to remove any cleaning solution and residue.
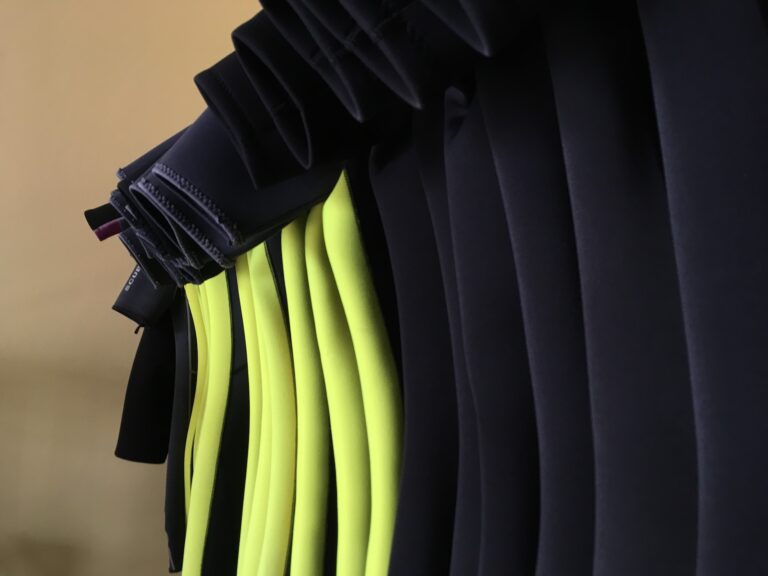
  7. When hanging the wetsuit, use a thick wetsuit hanger. Thin hangers will cause the shoulders of the wetsuit to misshapen. If you do not have a wetsuit holder then fold the wetsuit down in the middle over the normal hanger with the arms and legs hanging down.
  8. Hang it inside out to dry the inside of the suit first. Some wetsuits have a nice thermal, fleece patch inside the chest. If this takes too long to dry, it can start to smell.
  9. Let it drip dry over the shower or bathtub. Try to ventilate the room as much as possible, so use a fan or open a window. Or better yet, let  your wetsuit dry outside away from the sunlight.

Storing your Wetsuit at Home

Once your wetsuit is completely dry, you should store it somewhere well-ventilated and ideally hanging.

Never fold the wetsuit or crumple it in a tight ball. Even when it is cleaned. This will weaken the fabric and can also leave indents when you next use it.

Never iron a wetsuit either!

Use a thick hanger to hang your wetsuit. If you do not have a thick hanger, you can tape several thin hangers together to create a wider hanger.

Spaces to hang your wetsuit could be an open closet, in the garage, or a large storeroom.

If you do not have space to hang your wetsuit, then you can pack it away. However, never pack it too tightly. If you do not plan on using the wetsuit for a while, then you can fold it loosely in an empty suitcase. Do not put anything heavy on the wetsuit as this will crease the fabric.

Rips and Tears in a Wetsuit

Neoprene and the rubber of a wetsuit can rip over time. A nick of a dive knife, getting caught on a nail at the pier, getting snagged on a rock, or just general wear and tear can cause the wetsuit to rip or cause a slight tear. Depending on what you are wearing under your wetsuit can also impact your wetsuit; knots, zips, or metal decorations. The most common areas will be around the neck and wrist seals.

This doesn’t mean you need to throw away your wetsuit. It is good, however, to always inspect your wetsuit after cleaning it at home, as small rips and tears are much easier to fix than large holes!

You can get a wetsuit repair kit, neoprene cement, or a puncture tire repair kit from a bicycle store. The glue is very similar. 

Repairing a Wetsuit at Home

  1. Find the two edges of the neoprene that need to meet up
  2. Place some glue onto both edges, use a matchstick to spread the glue around
  3. Wait for the glue to dry a little bit
  4. When the glue is close to drying and sticky (rather than ‘wet’) then push the two edges together
  5. Hold it in place for a few minutes
  6. Lay it on a flat area
  7. Let it dry overnight

You can also use heavy polyester thread or dental floss and sew the rip up. Be aware that if you push the needle through the whole fabric then this will create tiny holes that will impact the efficiency of your wetsuit. The best way to sew is using ‘blind stitch’ which should only penetrate slightly into the fabric.

Conclusion

Knowing how to clean a wetsuit at home is important to keep it in good condition. Wetsuits can withstand a lot of rough and tumble, but general wear and tear will slowly weaken the fabric. This is why you will need to always rinse your wetsuit in freshwater, and keep it stored properly to stop the stink! Just doing a few small things to protect your wetsuit will go a long way in preserving the fabric, long after the fashion of your wetsuit has changed!

How To Get Rid of Blocked Ears after Diving

The quick answer – don’t get them blocked in the first place! One of the first things you will have been taught when learning to dive is how to equalize your ears to deal with the pressure. But what about after the dive? What if you have some sea water in ears? How to clear ears after diving is easy and should not be a painful or lasting issue. Read on to find out how to get rid of blocked ears after diving and how best to avoid water in the ears for future dives!

How to get rid of Blocked Ears after Diving

A common question from divers, and especially beginner divers, is how to get rid of blocked ears after diving. This can seem quite scary at first, as your hearing will be limited and you might feel nauseous. But this is actually a common issue and can be fixed by trying out the following methods:

  • Lie on your side – gravity will help the water drain out of your ear.
  • Wiggle the earlobe – take hold of your earlobe and wiggle it while tilting your head down.
  • Hairdryer – some people find a hairdryer can help evaporate the water inside their ear. Turn on the dryer about 30cm away from your ear on the lowest setting. Gently tug on your earlobe and let the air blow inside. Be careful not to bring the dryer too close to your ear.
  • Hot compress against the ear and tilt your head
  • Vinegar/alcohol eardrops – mix together 1 part alcohol to 1 part vinegar, then put a couple of drops in your ear. Wait 30 seconds then drain the solution out. Do not use this method if you have an ear infection or perforated eardrum.
  • Hydrogen Peroxide eardrops – perform the same method as with vinegar/alcohol, and follow the same precautions if other ear issues already exist.
  • Or use a commercial product such as Swim-EAR. This relieves water-clogged ears and dries the water in your ears. This works best when you use it straight after a dive.
How To Get Rid of Blocked Ears after Diving - use Swim-Ear drops

Sea water in ears! How does a ‘Blocked Ear’ occur?

The proper medical term for “blocked ears” is Middle-Ear Barotrauma or MEBT. MEBT occurs when you have built up blood or fluid inside your middle ear. In the worst cases, it can lead to eardrum rupture.

In the middle of your ear is a chamber called the tympanic cavity. This is an empty space in the middle of your ear that needs to be maintained at the same pressure as the surrounding environment.

A tube called the Eustachian tube connects this chamber to your throat.

In normal daily life, the Eustachian tube allows the tympanic cavity to maintain the same pressure as outside. Regular jaw movements such as swallowing and yawning help to equalize the pressure.

Problems can start to occur however if the Eustachian tube is blocked or obstructed. This can occur for many reasons. Some of the most common are colds, inflammation of the tube, being born with narrower tubes, or a buildup of earwax.

When descending during a dive the tympanic cavity will become compressed. You must regularly equalize to stop the cavity shrinking and allowing water to seep inside. If the cavity/space does not equalize then this becomes a MEBT.

Risks associated with Blocked Ears

There are several risks associated with blocked ears that you should always try to avoid:

  • Middle ear Barotrauma – water in the tympanic cavity can be both painful and lead to infections. 
  • Damage to the eardrum – a ruptured eardrum can lead to serious issues including permanent hearing damage and balance issues.
  • Infection – infections can be painful and dangerous in any part of the body. Infections of the ear can be particularly dangerous. If you think you have an infection developing, then speak to a Doctor immediately.

How long can water stay in your ear?

Water will normally drain from your ear naturally within 2 to 3 days. If the water remains longer than this then visit your doctor for further investigation. The longer the water sits in your ear, the more likely you are to develop an infection.

Read More: What is Swimmer’s Ears, and what are the symptoms of having water in your ears?

How to avoid a blocked ear – why equalizing properly is important

To help avoid a blocked ear there are several things you can do:

Before you even begin the dive you can help reduce the risk of a blocked ear. The Eustachian tube is particularly vulnerable to mucus build-up. Certain foods and compounds can lead to increased mucus production. Drinking milk, in particular, can lead to increased mucus production. Tobacco smoke and alcohol irritate your mucus membranes so will again cause increased mucus production.  Avoid these substances in the days leading up to your trip to help reduce the chances of a blocked ear.

On the day of the dive, when you enter the water you should make a slow and gradual descent. Do not feel you have to rush your descent. As you descend you should regularly equalize the pressure. There are a number of common techniques for equalizing:

  • Valsava Maneuver
  • Swallowing
  • Toynbee Maneuver
  • Lowry Technique

Read More: Why the Toynbee Maneuver is safer than the Valava Maneuver

These dive masks with ear covers can also help people who are prone to getting water in their ears.

The water-tight cups keeps water out and prevents Swimmer’s Ear.

Conclusion

Blocked ears can be both painful and dangerous. A blocked ear on the first day of a dive holiday can lead to an unhappy trip. Practice equalizing your ears regularly. When descending, take your time and use one of the common equalization methods to equalize regularly. If you start to feel pain, ascend a little and try to clear again.

A common question when beginning to scuba diver is how to get rid of blocked ears after diving. If you do suffer from a blocked ear or seawater in ears then use one of the methods above to help drain the fluid from inside your ears. 

Whatever you do, if the pain lasts more than a day, visit a doctor immediately. Left untreated, serious problems can develop leaving you with hearing and balance issues.

Diving in Melbourne, Port Phillip Bay – Australia

WHERE ARE WE GOING?

Today we are diving in Melbourne, Port Phillip Bay and Bass Strait – Australia

WHY ARE WE DIVING IN MELBOURNE?

The best part of diving in Melbourne would be its variety. Melbourne has everything from historic wreck dives, temperate water reefs, to easy pier dives.

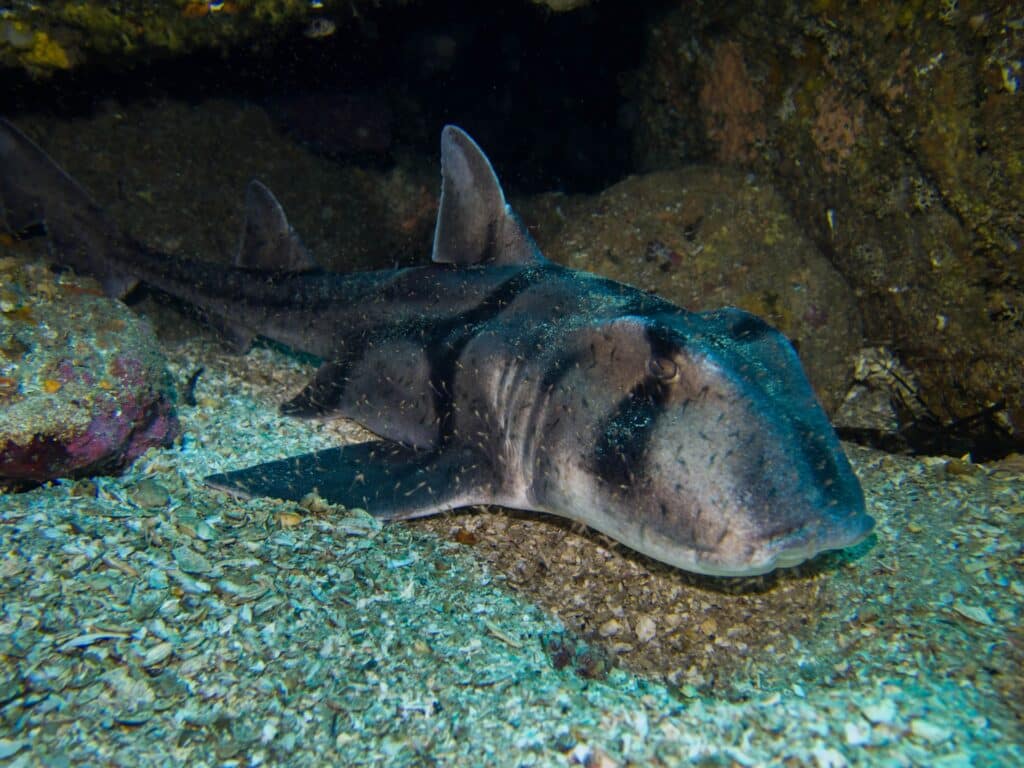
There is a variety of species that are endemic to southern Australia such as weedy sea dragons, blue groupers, giant cuttlefish, blue ring octopus, Port Jackson sharks etc.

Nudibranchs around here are found in less variety but tend to be bigger in size compared to the tropics (based on limited personal experience).

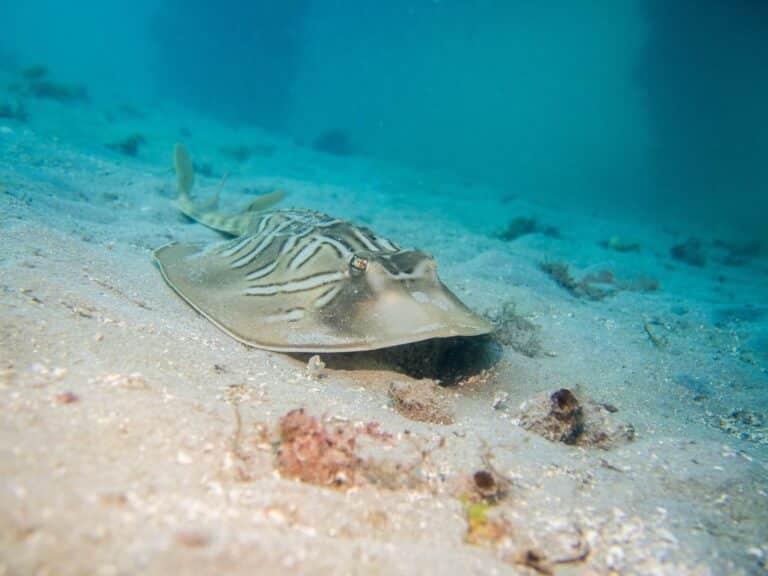
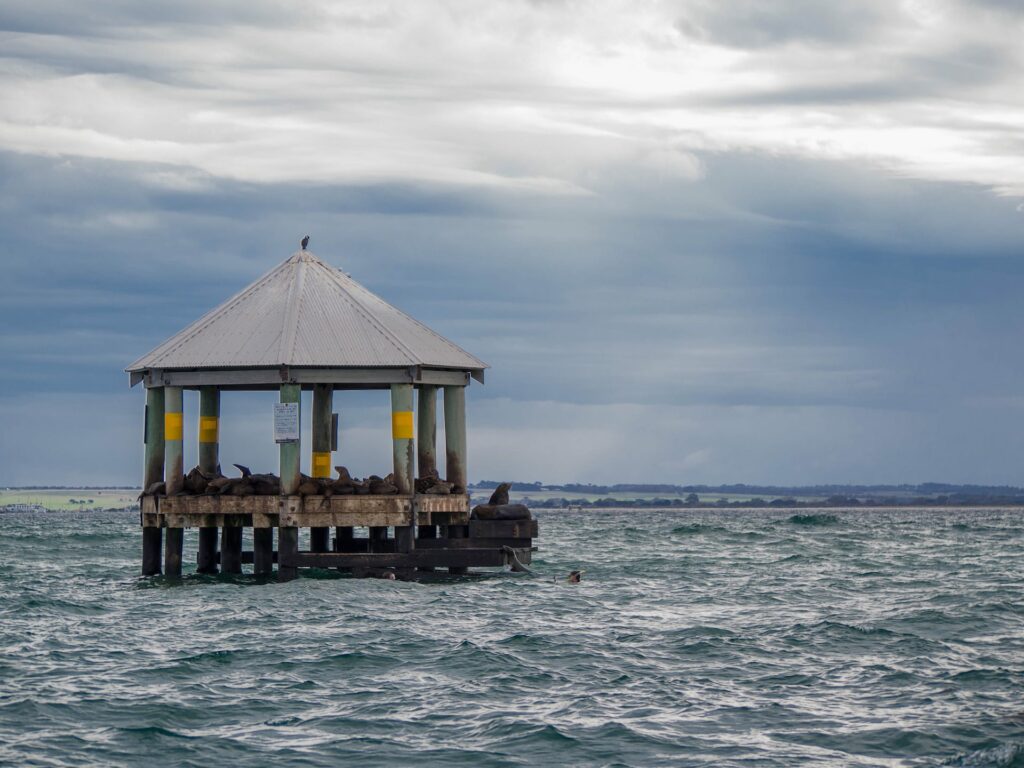
Most pier dives tend to have residential smooth rays. Fur seals visiting divers are quite common on open water dives. Great whites less so, but are around. 

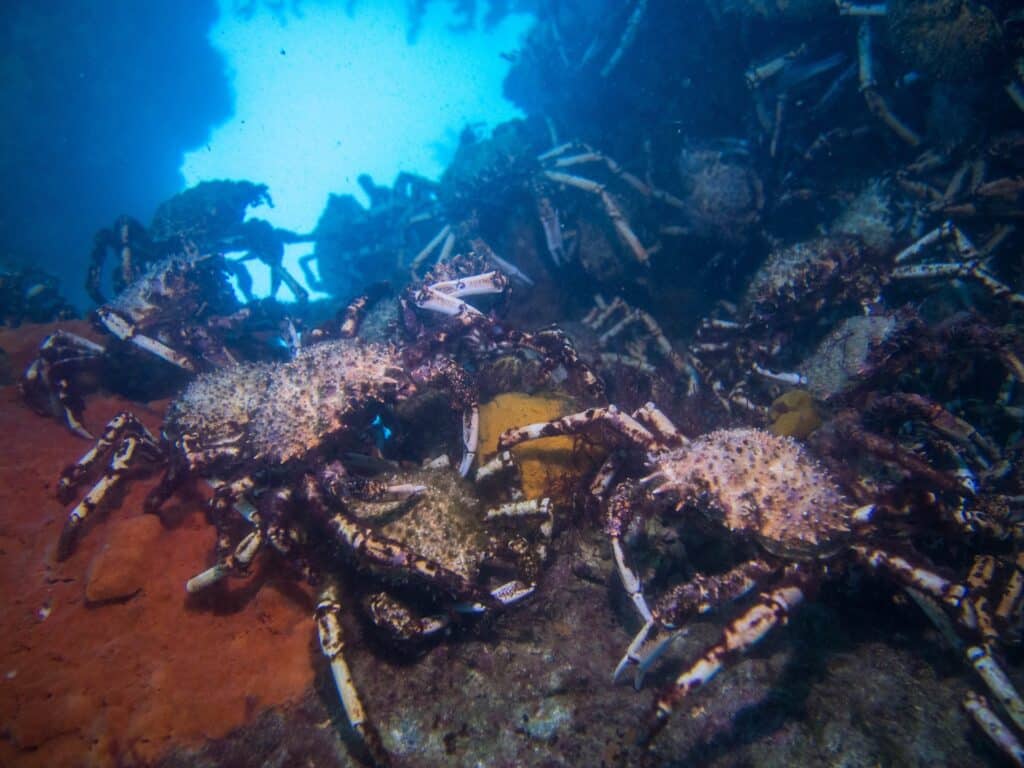
Due to its feature on Blue Planet 2, the annual spider crab migration is now quite well known.

Melbourne Spider Crabs. Photo courtesy of Qing

HOW DO WE GET THERE?

Either stay in Melbourne city and make the 1.5-hour drive down to the Mornington Peninsula. Or stay down on the peninsula itself.

While dive sites are scattered all around Port Phillip Bay and just beyond the heads, most dive operators launch from the Mornington Peninsula. Some do offer pickups from Queenscliff.  

Getting there by car is the best option. While there are public transport options, these are not recommended

bass strait diving in melbourne
Photo courtesy of Qing

WHICH DIVE SITES ARE MUST-SEE?

Blairegowrie Pier (max 7m) – An easy dive, great for night dives and macro life. A popular spot to see spider crab migrations. Blairegowrie Pier is an active boat pier, so divers need to be aware of No Go Zones. But despite the restrictions, you can have quite a long dive. 

Flinder’s Pier (max 6m) – Easy dive, one of the best spots to see Weedy Sea Dragons. 

J4 Submarine (max 28m) – A WW1 submarine. Usually an easy dive, but can be susceptible to surge. Only accessible by boat as it is outside Port Phillip Heads. One of 7 J-class submarines wrecks, scattered within and outside of the bay. 

Castle Rock (max 20m) – An easy dive, a large bommie showcasing a temperate reef.

Ex-HMAS Canberra (max 32m) – An ex frigate sunk in 2009 as a dive wreck in mind. Has multiple penetration points and was left as intact as possible.

Lonsdale Wall system –

A wall system just within the heads of Port Phillip Bay, about 1km long and has a variety of dive sites scattered along it. Depending on the particular points, depths can go beyond 45m. Most sites can only be done on slack water or as a drift dive. 

While experience is recommended to enjoy more of the wall there are easier sites such as Lonsdale Wall Shallow (max 18m). 

Be aware when speaking to locals, Lonsdale Wall can refer to the entire wall system or a specific site (max 38m) on the wall.

Photo courtesy of Qing

TELL ME MORE

Beyond the pier dives, there are many other shore dives available around. This is spread all around Port Phillip Bay. From the Mornington Peninsula, some Western Port shore dives are also accessible.

The majority of dive sites are off a boat, a 20-30min boat ride would be expected.

DO I NEED ADDITIONAL EQUIPMENT?

7mm wetsuits are recommended. 5mm is doable in the summer or if you’re good with the cold.

Drysuits are not unreasonable, but unless you already own one, it can cost a bit.

Due to the temperature, hoods and gloves are highly recommended. 

Fins WITH booties will be more comfortable. This is easier and needed for rocky shore entry and exits.

Torches are recommended as many dive sites here have small nooks and crannies you might want to check out.

shark-diving in melbourne
Photo courtesy of Qing

WHAT LEVEL CERTIFICATION SHOULD I BE?

Open Water is fine for the pier dives, and a few of the easy sites. But AOW is recommended to enjoy a larger variety of dive sites.

Conditions around here can vary quite drastically depending on the day and weather, so the more experienced you are, the more sites would be accessible.

WHAT ARE THE CONDITIONS?

Melbourne’s weather can be temperamental (we can get 4 seasons in a day!), so diving conditions are very dependent on the conditions during and before the day of the dive. 

The water temperature here tends to sit around 13 to 15° Celcius but can rise to a balmy 23°C degrees in summer. (After a heatwave…. and only really in the bay!)

Summer tends to be most comfortable as surface intervals in the sun will easily warm everyone back up. But visibility can be best during the wintertime (June to August) and can get up to 15 meters. Average visibility is probably around 5-10m.

Currents and drifts are dependent on individual sites. 

HOW MUCH WILL I SPEND?

Around $65 AUD prior to gear hire.
(Disclaimer: I do not dive with a commercial operator, so I’m not too sure on this part)

WHAT TYPE OF ACCOMMODATION IS AVAILABLE?

If staying in and around Melbourne city, all varieties of accommodation are available.

The majority of the Mornington Peninsula are popular summer vacation locations, so accommodations tend to be beach houses/apartments for hire with some options for boutique hotels and motels.

WHERE DID YOU STAY?

I live here!

DESCRIBE YOUR PERSONAL EXPERIENCE

I definitely do enjoy diving in Melbourne, the varying conditions mean dives on the same sites can be quite different from dive to dive.

Melbourne might not be the idyllic place for try-dives, but definitely a place to check out once you are into diving due to its variety in life. 

WHAT DO WE DO ON SURFACE INTERVALS?

If staying in Melbourne City there is plenty to do, the city can sell itself. 

Most towns along the peninsula have their own selection of local pubs and cafes.

Mornington Peninsula has as much variety in its walks as its diving. Arthurs Seat Circuit walk, Bushrangers Bay Walking Track, Point Nepean National Park Trails, Red hill Trail etc.

Most walks will have plenty of lookout points, Red Hill has a few wineries.

Almost all the towns are connected by the beach.

Tips to Stop a New Scuba Mask Fogging

One of the most annoying things when scuba diving or snorkeling is when your mask is too foggy to see through! So what was supposed to be a relaxing activity, soon becomes a frustrating and annoying experience. As an instructor, I have seen many students come in with a new scuba mask fogging up. These are the tips I give them to ensure they can see and enjoy all of the cool things underwater!

How to Fix a New Scuba Mask Fogging

Brand new masks have a silicone layer on the glass of the mask. When heat touches the glass, this will turn into little droplets of water that will fog up the mask. The heat vapor will come from your nose and face, while the glass will be cooler from the water surrounding the mask. The hot and the cold will cause condensation on the glass which creates the fog!

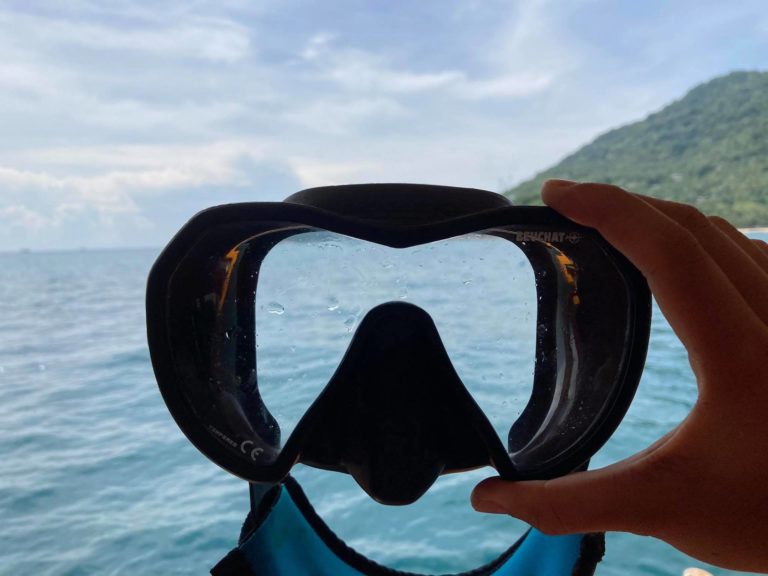
Editor’s Note: I have the Beuchat Maxlux S mask in Black and Ultra Blue, and both masks fogged up very badly the first few times I took it diving!

When a mask fogs up, this will cloud your vision and you won’t be able to see through it. It can totally ruin your diving trip!

This is why you will need to properly clean a new scuba mask to stop it from fogging. It is such an annoying issue that even PADI has written about it.

Check out some of our favorite methods below and our best ways fix a new scuba mask from fogging!

How to Defog a Mask

Toothpaste Overnight

This is the easiest and safest way to clean a new scuba mask. To use toothpaste to defog your mask grab some white, non-abrasive, non-gel, toothpaste. Smear it on the inside of the mask, covering every part of the glass. Leave it for at least an hour, or overnight, then rinse it off with clean fresh water. The toothpaste will rub away at the silicone layer, and you’ll also have a minty fresh smell when you go for a dive!

Dive Mask Anti Fog Solution

These little handy bottles of anti-fog have a magical solution that leaves a smidge of film on your mask. This is enough to stop those pesky water droplets from sticking onto the mask and fogging it.

Burning Silicone Layer

For this method, you will need to make sure you have a tempered glass mask, not plastic. You will usually only have to do this once when you have just bought your new scuba mask.

You can grab a lighter, test to see the strength of the fire, then put that fire under the inside of the glass of the mask. It will create a black film on the glass. Move the fire around so that it ‘burns’ most of the glass. Just let the fire lick the glass and move it around, don’t concentrate it for too long in a certain spot. After the whole inside of the glass is black, let it cool before rinsing off the black film with clean, fresh, water.

Make sure the fire doesn’t touch the skirt of the mask otherwise this will melt!

Baby Shampoo

Baby shampoo is a great mask defogger. Before every dive, just add a dab of baby shampoo or dish-washing liquid to the inside of the glass of the mask. This creates a thin layer of film that will stop the water droplets from collecting and creating a fog. Be careful not to use too much shampoo otherwise it can sting your eyes (which is also why we recommend baby shampoo)! But also don’t rinse too much of the shampoo out of the mask, otherwise, it will defeat the purpose and just fog up again!

Spit Defogger

Ah, the oldest, grossest, and most efficient way to clean a scuba mask is to use your spit or saliva!

Hock up some saliva, spit into the mask, then smear it around the glass. Dip it quickly into the water then put the mask on and you should have a fog-free mask! This works by leaving a thin layer of saliva on the glass, so it is best done just before you put your face into the water. Gross, but effective. Especially gross when renting or sharing a mask with someone else!

What Types of Scuba Masks are there?

A good scuba diving mask will be made out of tempered glass. This is made to withstand pressure from the water while underwater.

Plastic masks are very cheap and you will find them hanging in every cheap tourist store. However, these masks will scratch easily which will severely impact your view – almost worse than the fog!

Cheap masks will also have very hard, rubber skirts. The skirt is what sticks to your face and when it is hard and rigid, it will not mold to your face well which means it won’t fit properly.

When a mask does not fit properly, it means water will keep leaking in; even when the mask is on tight. A leaking mask is also a very annoying problem when snorkeling or scuba diving! Here are some of our favourite masks that are made for scuba diving and snorkeling.

WACOOL Scuba Diving Set

Cressi Mask & Snorkel Set

Beuchat Maxlux S Mask

How to Clean a Dive Mask

After each salty dive, it is a good idea to clean a dive mask. This stops salt from building up, and to ensure mold doesn’t grow on the silicone skirt of the mask.

To clean a dive mask, use warm soapy water. Submerge the mask in the water and use your fingers to wipe any sunscreen residue, sand, or grime off the mask. Be sure to pay attention to the silicone skirt, and wash the inside of the nose piece. Use an old toothbrush to scrub the mask (not the glass) if you notice some mold.

When finished with cleaning the mask, use a towel to dry and leave it in the shade for the inside to dry out too. Algae and mold can sometimes grow inside a mask if it hasn’t dried out properly, or is left in a moist environment.

Read More: Tips on How to Clean Snorkel Gear

Defogging a Mask

Owning your own scuba mask is a small investment that will pay off for future trips. With a few small preparations before your scuba diving trip, you can avoid a fogging or dirty mask. Toothpaste, burning the glass, spit and anti-fog solutions are some great methods. By following our best ways on how to defog a mask, you will be sure to stop your new scuba mask from fogging on your next dive!